This is the notes describing the process of getting a basic dashboard interface controlling and displaying data using the Arduino Cloud IOT library and an ESP32.
For a more comprehensive look at the Arduino Cloud IOT features (and issues), read my product review.
Preparation & Installation
This flow is a rough summary of the official getting start guide, with some hardware specific notes.
Cloud setup
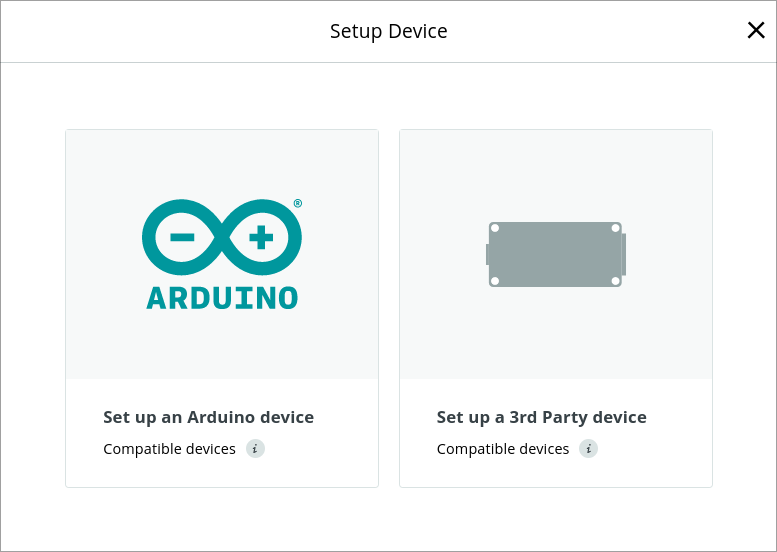
After creating an Arduino Cloud account, the device needs to be setup and then bound to a 'Thing'.
- Devices are each board which runs the Arduino Cloud IOT connection firmware, are are assigned a unique key for their connection.
- Things are the logical grouping of cloud connected variables.
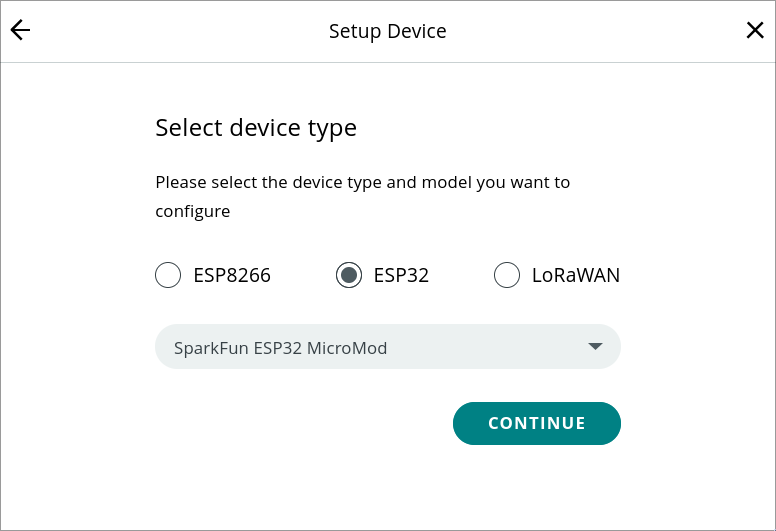
The setup flow includes pathways for the supported Arduino hardware or Espressif boards.
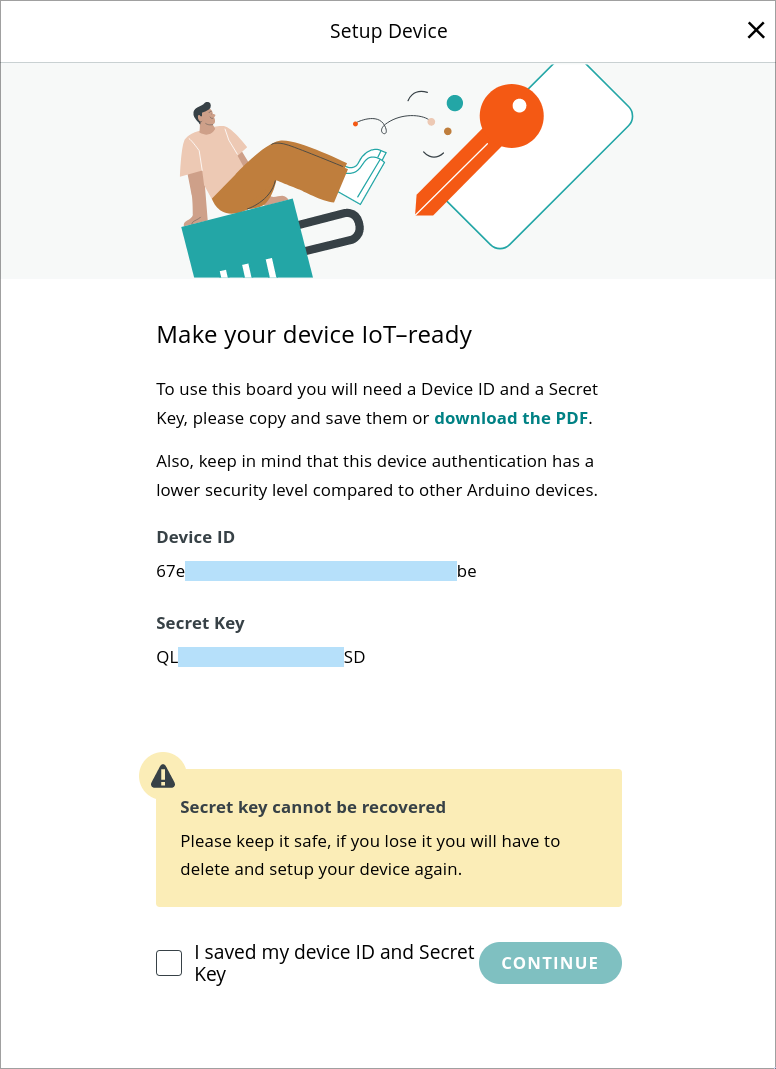
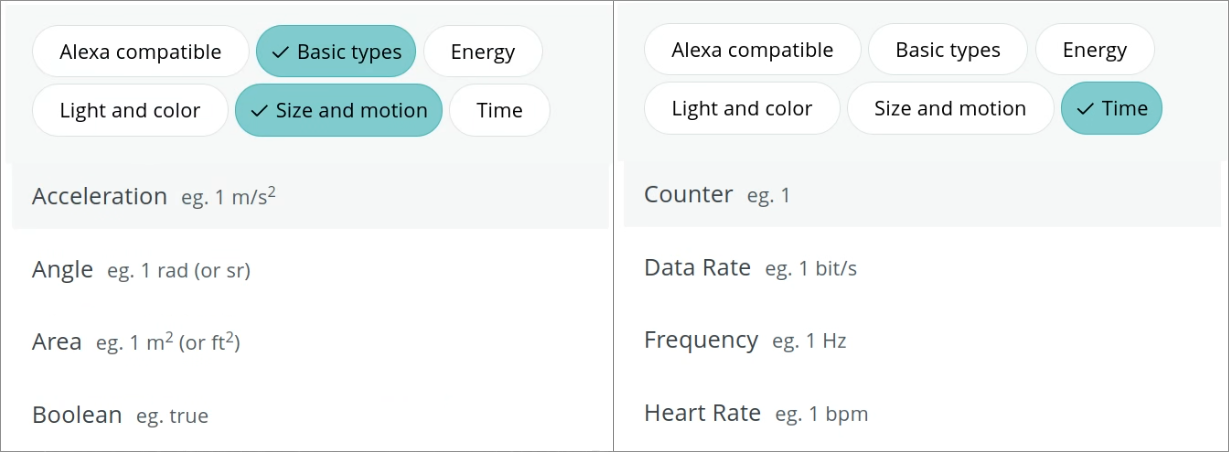
With the device ID and secret key in hand, variables can be added to the Thing.
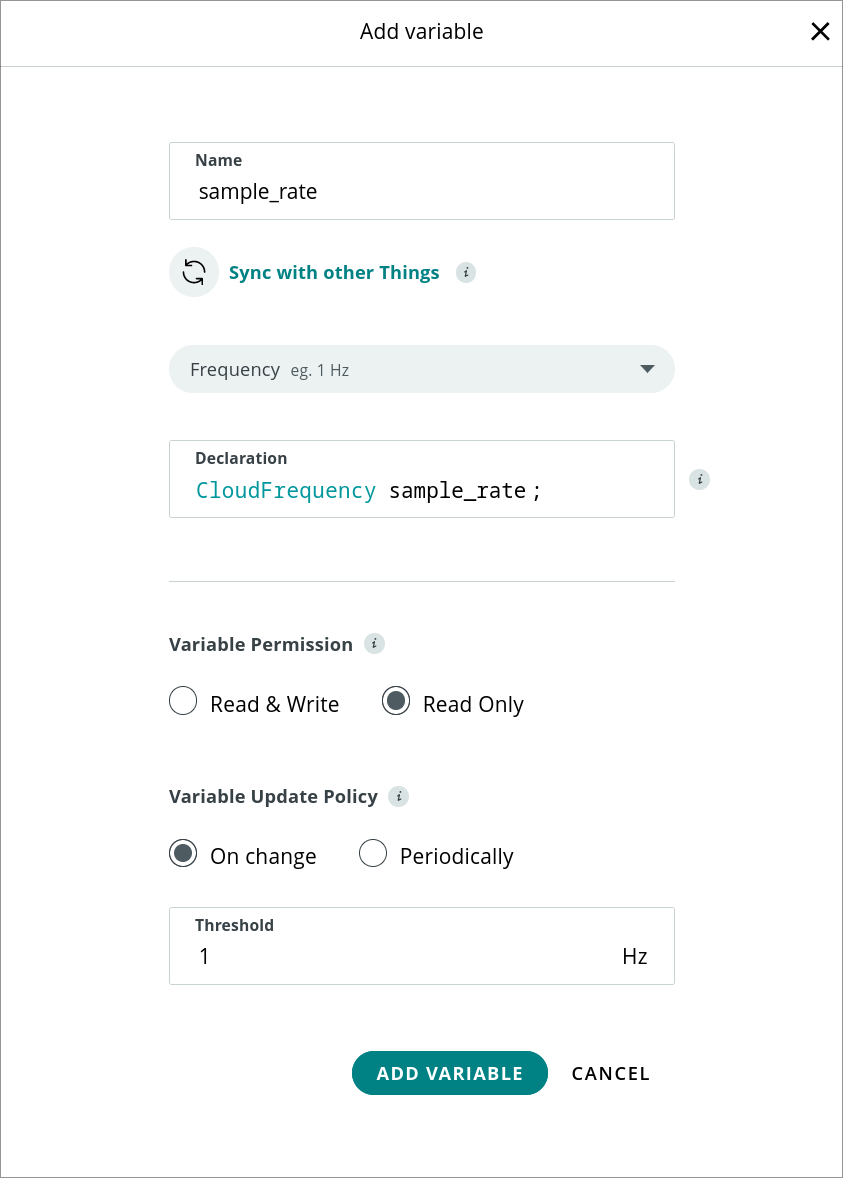
Variables are referenced by their name throughout the dashboard and firmware, and can be assigned a descriptive type which is handled automatically by the Arduino library.
Polling or threshold based event updates can be configured, along with the ability to mark the variable as read only. The dashboard tooling will refuse to connect output components like sliders to read-only variables which will help guard against confusing mistakes later on.
With the variables setup and the WiFi connection network information setup as secrets, a skeleton Arduino sketch is available in the Sketch tab.
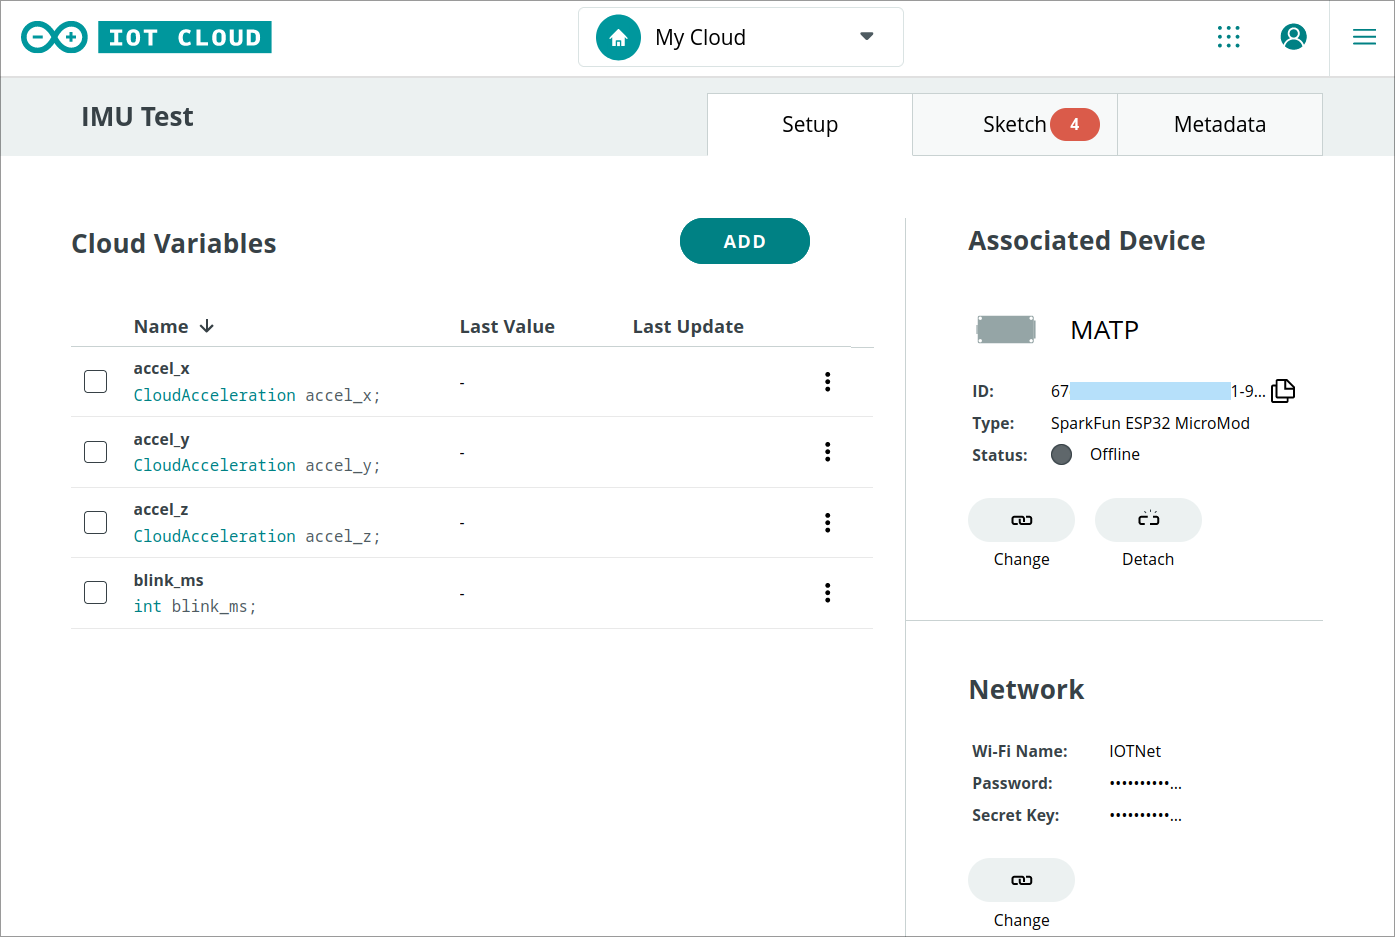
Connecting the hardware to Arduino Cloud only needs this sketch to be flashed along with connecting the sensor read functionality up to the cloud variables.
Hardware Setup
For this test, I'll be using Sparkfun's ESP32 breakout along with a LSM6DS0 IMU breakout connected over I2C.
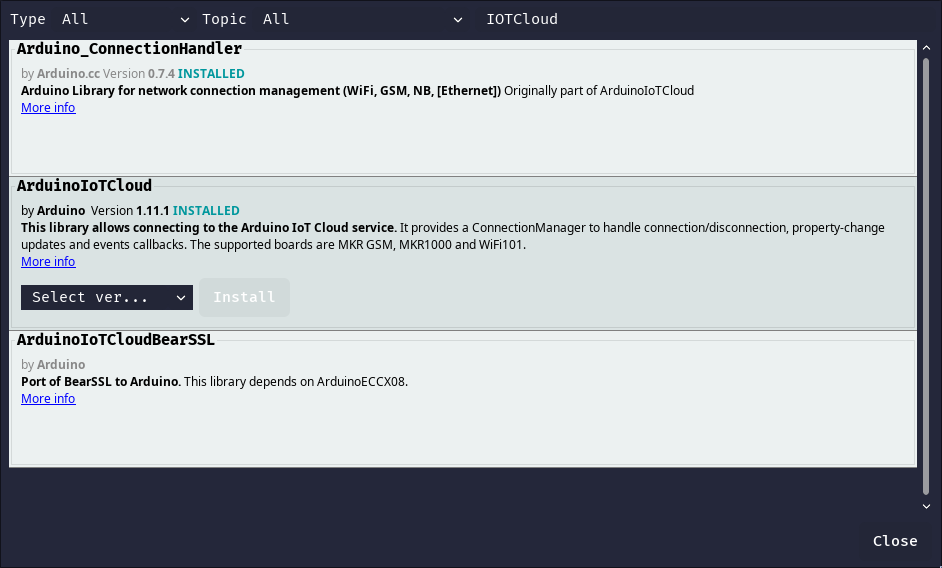
Instead of using the Cloud compile option I opted to test the library using the standalone manager. This was mostly because I already have the IDE and don't feel the need to use the Arduino Create Agent and web editor.
The Sparkfun ESP32 boards package was installed through the board manager, along with the ArduinoCloudIOT library.
The resulting Arduino sketch is pretty simple, thingProperties.h is generated automatically and includes the simple setup calls for ArduinoCloud, and the main sketch just needs to sample the IMU and provide an adjustable blinking LED.
#include "thingProperties.h"
#include "SparkFunLSM6DSO.h"
#include "Wire.h"

LSM6DSO myIMU; //Default constructor is I2C, addr 0x6B

bool led_on = false;
uint32_t led_timer  = 0;

void setup() {
  Serial.begin(9600);
  delay(1500);

  // Defined in thingProperties.h
  initProperties();
  ArduinoCloud.begin(ArduinoIoTPreferredConnection);
  setDebugMessageLevel(2);
  ArduinoCloud.printDebugInfo();

  pinMode( LED_BUILTIN, OUTPUT );
  led_timer = millis();

  Wire.begin();
  myIMU.begin();
  myIMU.initialize(BASIC_SETTINGS);
}

void loop() {
  ArduinoCloud.update();

  if( millis() - led_timer >= blink_ms )
  {
    led_on = !led_on;
    led_timer = millis();
    digitalWrite( LED_BUILTIN, led_on );
  }

  accel_x = myIMU.readFloatAccelX();
  accel_y = myIMU.readFloatAccelY();
  accel_z = myIMU.readFloatAccelZ();
}
Compatibility issues
Attempting to flash this to the ESP32 MicroMod board would hit a compile error though,
/home/bandit/Arduino/libraries/ArduinoIoTCloud/src/ArduinoIoTCloudTCP.cpp: In member function 'int ArduinoIoTCloudTCP::begin(bool, String, uint16_t)':
/home/bandit/Arduino/libraries/ArduinoIoTCloud/src/ArduinoIoTCloudTCP.cpp:172:14: error: 'class WiFiClientSecure' has no member named 'setInsecure'
   _sslClient.setInsecure();
              ^
This is due to slightly incompatible version of the ESP32 Arduino core provided as part of the Sparkfun ESP32 boards package. While it's not an issue specifically caused by the Arduino Cloud IOT library, it does demonstrate the potential fragility and compatibility issues that come with hiding lots of complex networking functionality into one library.
I manually commented out the offending line in the library Arduino/libraries/ArduinoIoTCloud/src/ArduinoIoTCloudTCP.cpp:
#elif defined(BOARD_ESP)
  // _sslClient.setInsecure();
#endif
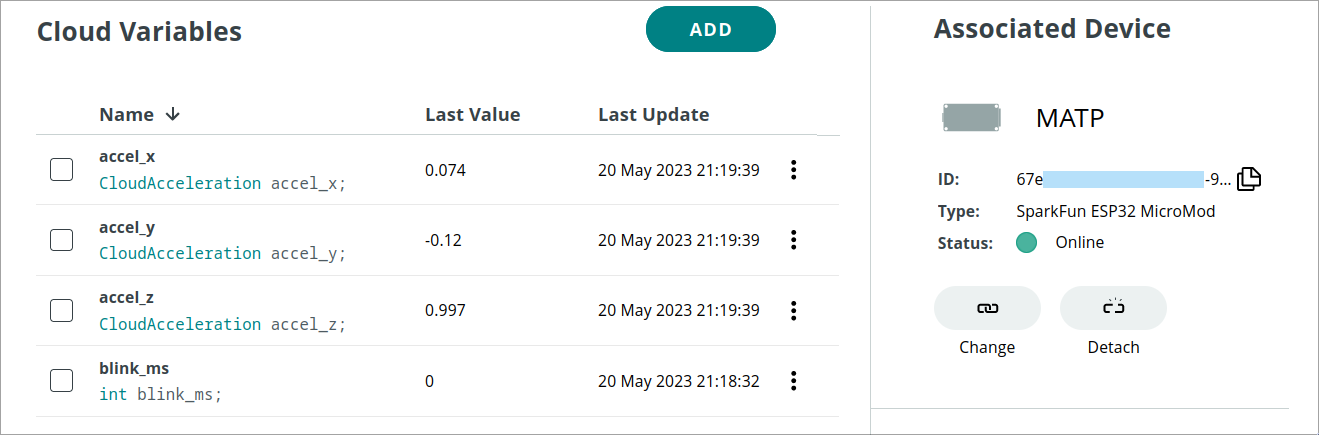
Once flashed, the cloud variables start updating with data!
UI Layout
Dashboard building can begin. This process is incredibly easy due to the simple process:
- Create a dashboard
- Add a component
- Select the variable driving the component
- Configure the component as needed
- Position it on the layout grid and repeat until done.
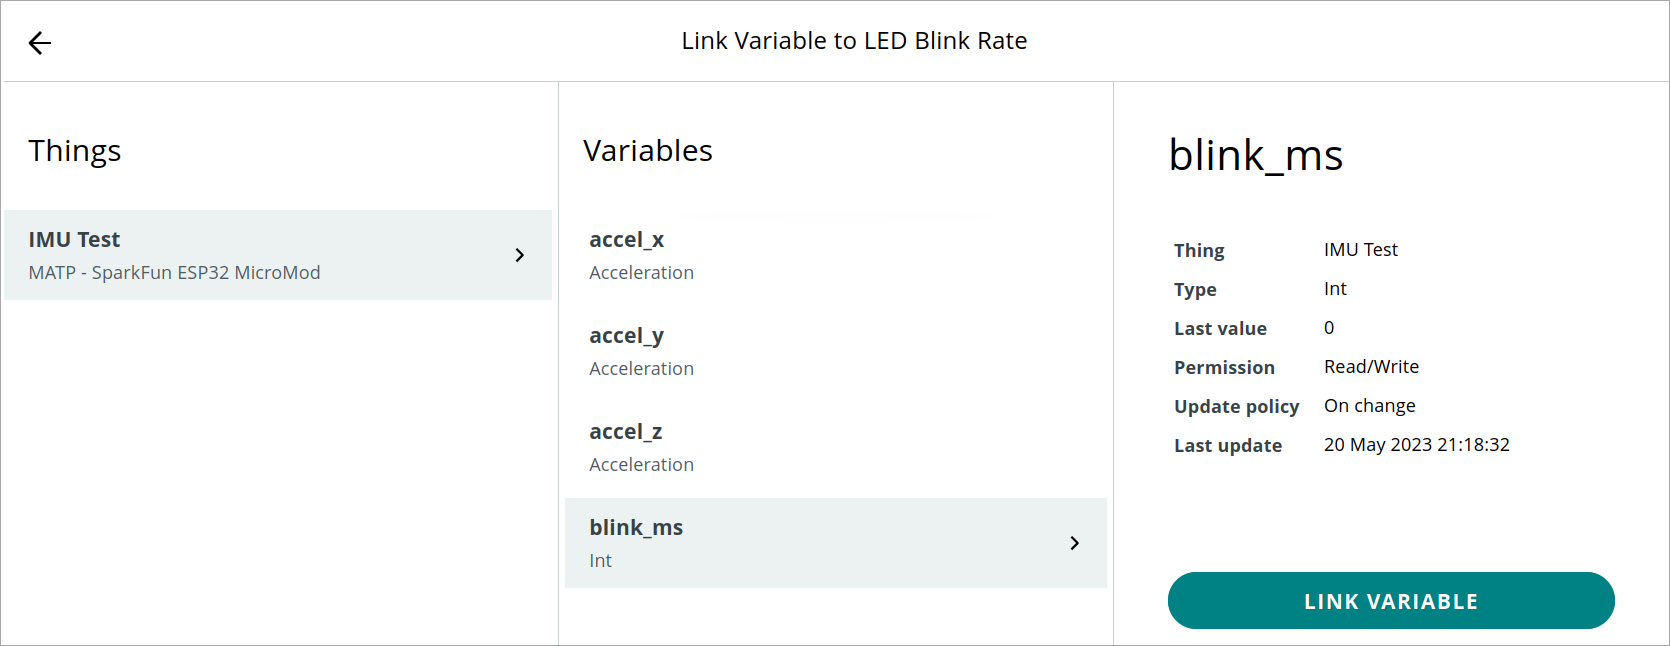
Adding a slider to control the blink_ms is the first test. The component add wizard provides a picker for the variable with some information about the type and value.
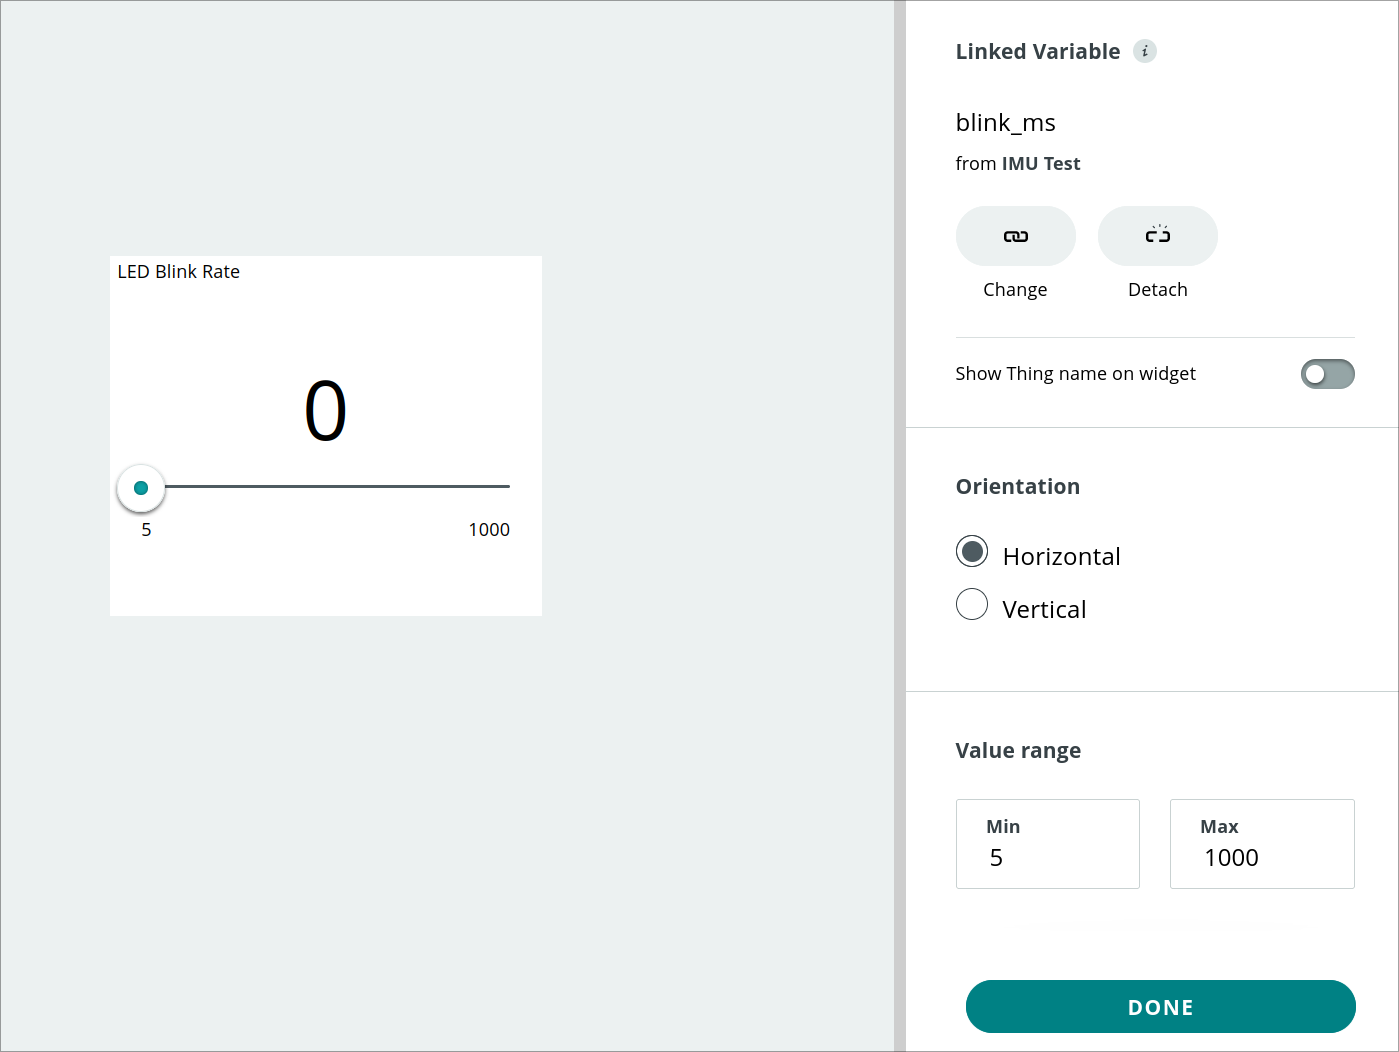
Once linked to the variable, it allows configuration of the minimum and maximum slider range values and orientation with a preview.
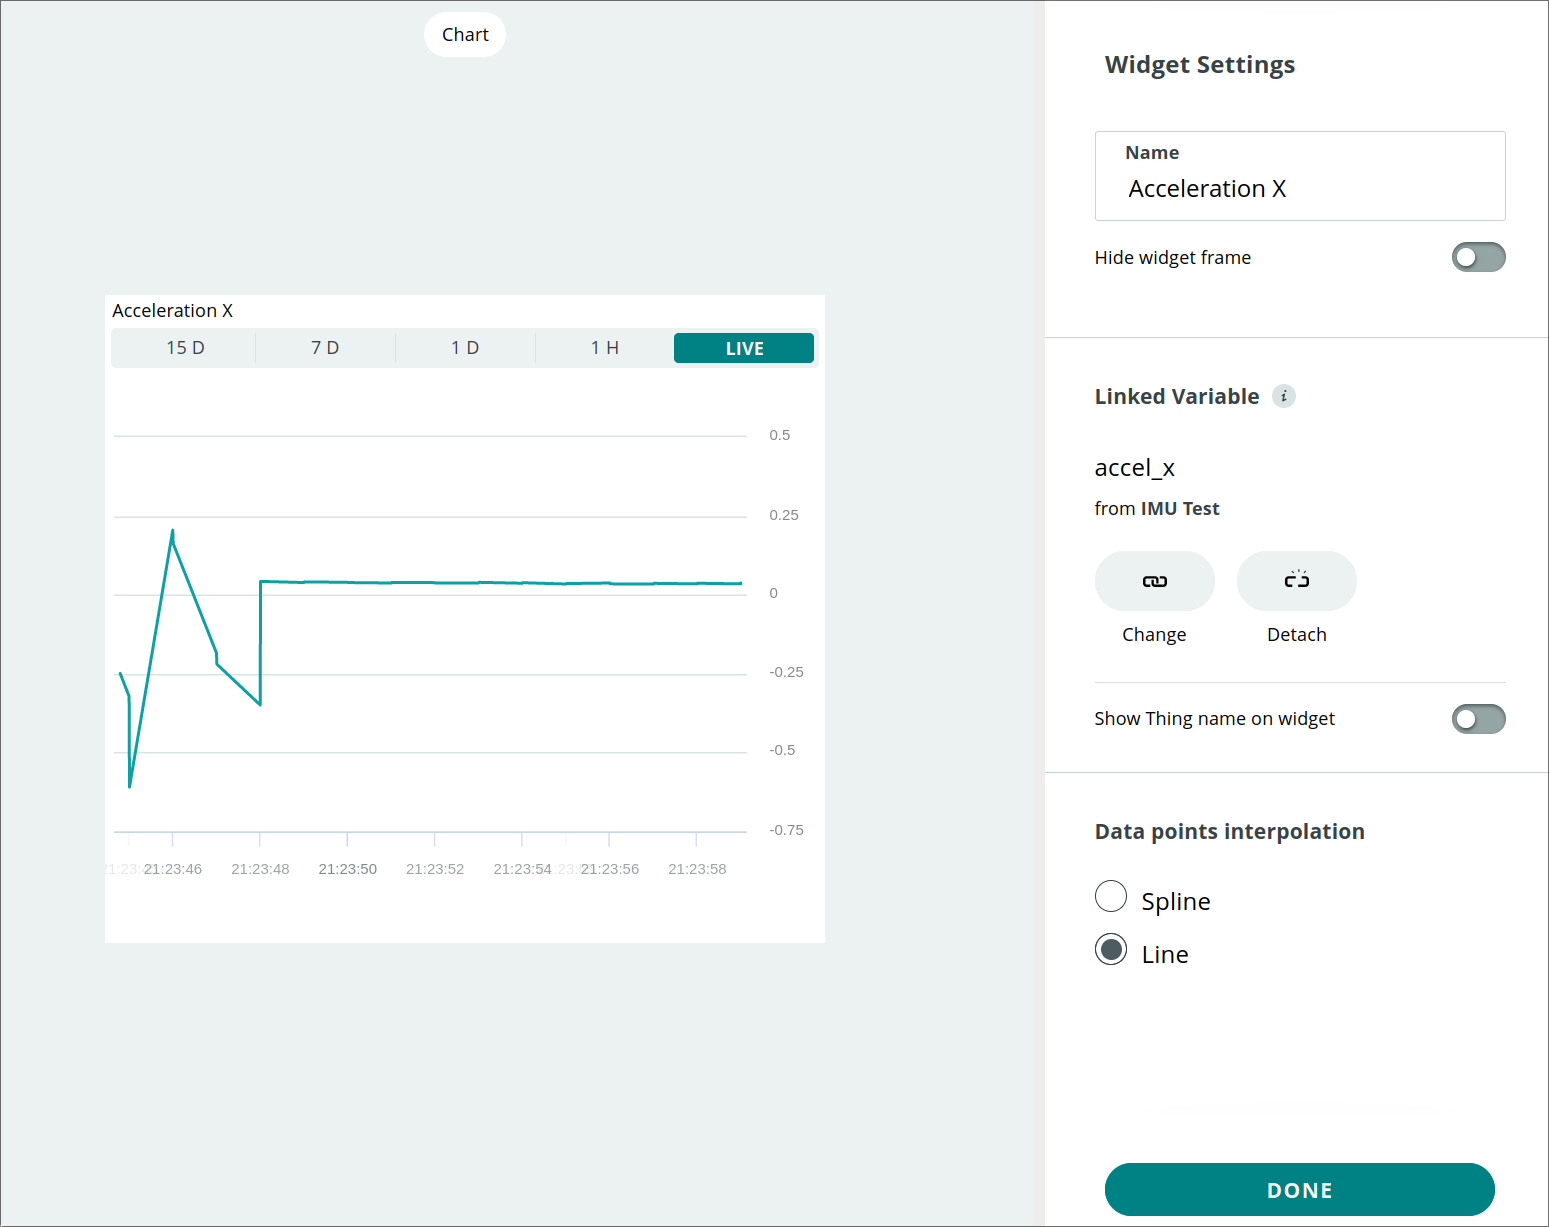
A simple line-chart is done the same way. The basic line chart only supports one variable and the only configurable option is for line or spline interpolations.
And that's it for the basic test - control over the blinking LED, a label which prints a variable, and a linechart.
Dragging the corners of the components resizes them, and dragging them lets you reposition them on the grid - they snap nicely into place once you drop them.
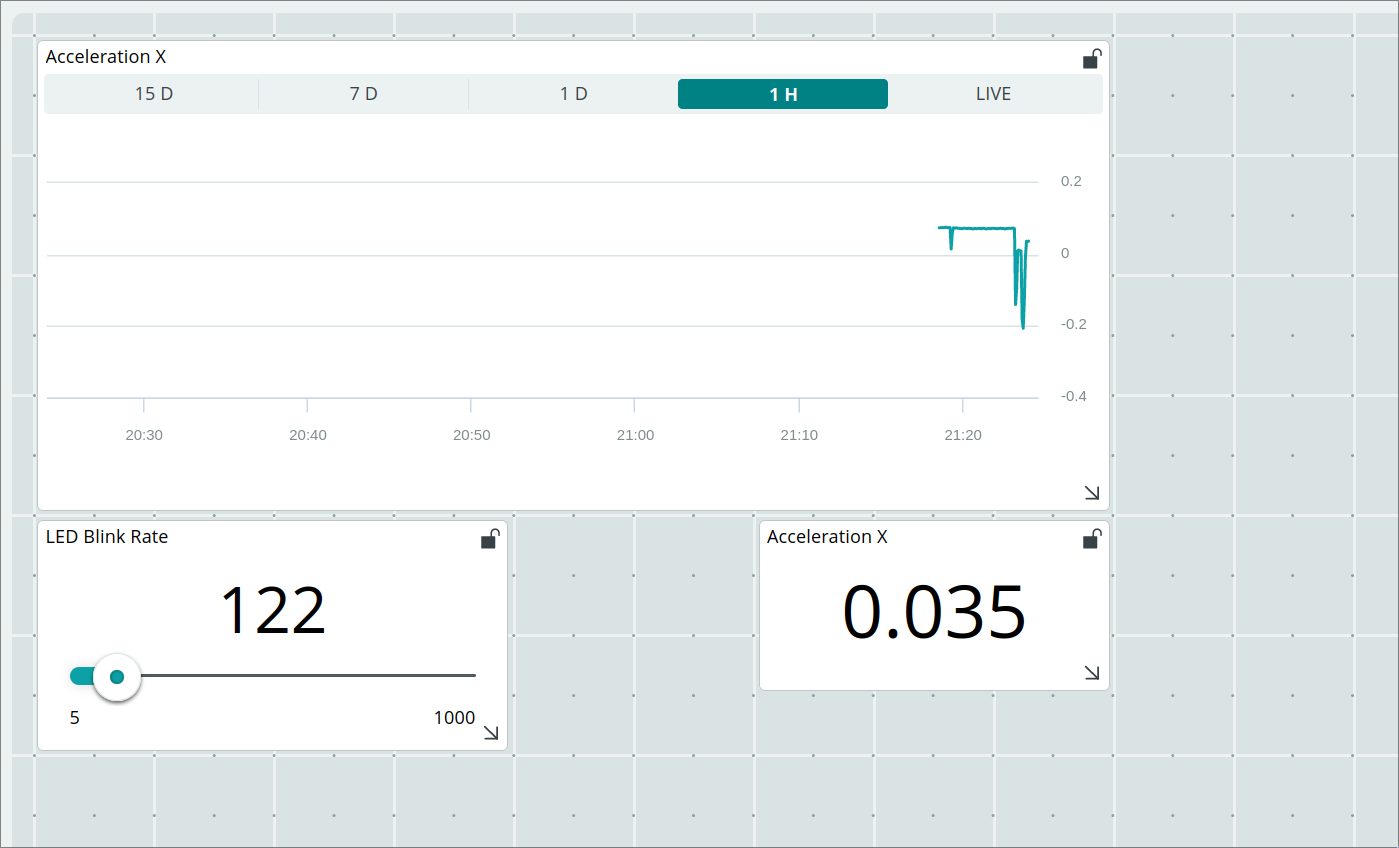
I do feel there's a missed win for a better quality dashboard - the acceleration variables are setup as CloudAcceleration types with m/sec² annotation but there's no ability to format the axis ticks or applying a units suffix on the value box.
In terms of responsiveness, interacting with the slider feels reasonably quick at ~300-500ms latency on change, and the accelerometer readings update about once a second.
Summary
Overall, the setup and dashboard building experience was very straightforward and took about 15 minutes. The entire process is well described in the official documentation with great descriptions and screenshots.
The hardware compatibility issue was easy for me to resolve, but I can see newer users getting confused by the issue and needing support to resolve it. While not the fault of the official library for supporting the ESP32 as a third party option, it shows me that a hassle-free experience is probably only guaranteed with officially supported boards.